Showing posts with label videotuto. Show all posts

Wednesday, 31 March 2021

How to draft the CAPE-RAGLAN


The Cape with a Raglan Cut


 Very, very easy garment to draft. The pattern is done from the basic block so it can be close fitted enough around the shoulder and follow the body shape nicely.


Follow the instruction and the video is at the end of that page for more fluency.


start from the basic dart block


First, dart distribution.


The shoulder dart and the bust dart are pivoted into the armhole for more ease of arm movement. 
There is no sleeve but the extra dart value counts.


Always make sure that the side seams and the shoulder seam dont change length. 


Now , the most important thing : levelling the shoulders


Draw an horizontal line from the lower tip (here the back, it can be the front, depending on your original block)


Lower the tip of the front shoulder so it reaches the horizontal line. The shoulder should have the same length and it can be done by pivotting the segment around the neckline-shoulder point.

Now the shoulders are levelled. It will allow total symetry on the curves drawn from that point down.


Draw the outline of the cape from the shoulder tip.

In our drawing, the cape will be very close fitted. You can draw it further away from the block to make the cape wider.


Mirror that line on the front.

Those curves are equal length because we have levelled the shoulder. It is important as those curves are part of the same seam.


Please, note that, if you have levelled the sides and the shoulder properly, the mirroring of the curve should be easy and be "spot on".


We can leave it here and drafa a simple cape with lateral seams


But we add Raglan cut openings for the arms


Draw the raglan lines.

Draw the front opening overlap line (2 cm away from the center front to position button and buttonhole.


Separate the pieces


Joining the two "sleeve parts".
Make sure than the bottom is the same as the original draft.

The overlap is minimal and at the arm level.

The top of the shoulder turns into a dart.


Round the outlines
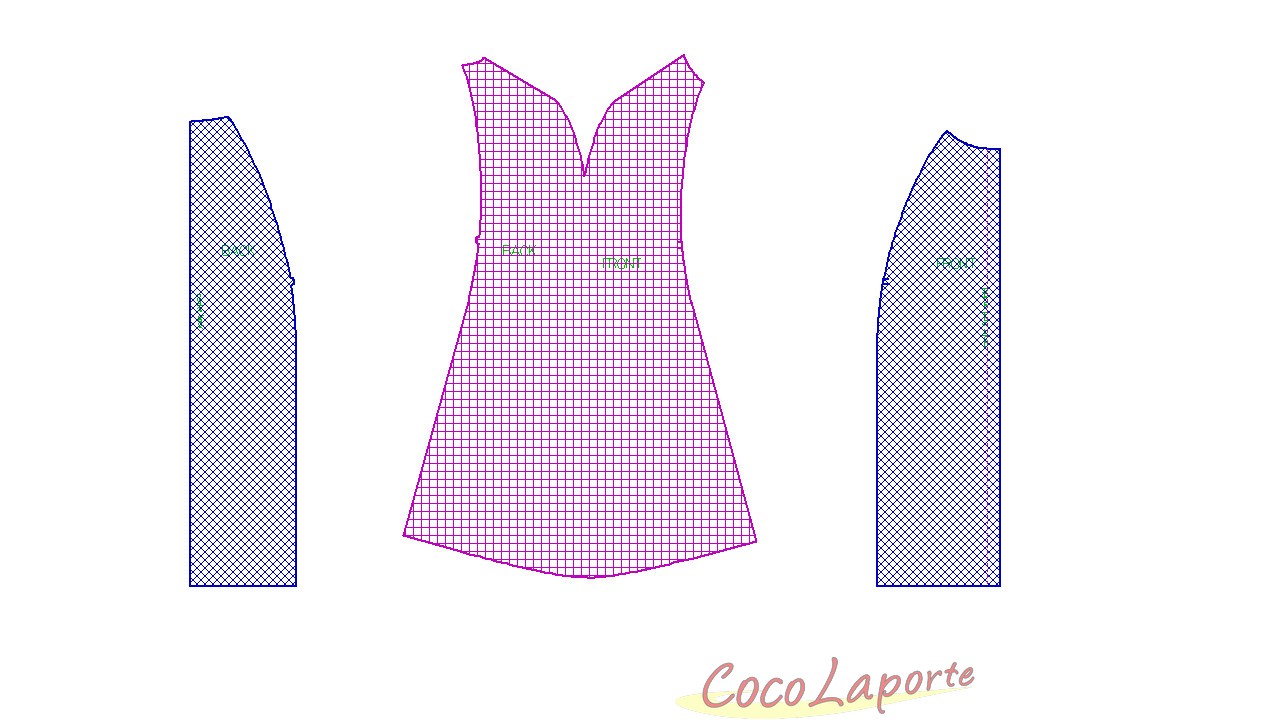


And notch properly. The notches mark the end of the seam and the begining of the split to let the arm throught.


and the video :


Thursday, 18 March 2021

The Shirt Collar without a stand - How to draft the pattern


How to draw a shirt collar

You can start by drafting a mandarin collar (see previous post there)


The rectangle equal the neckline measurement of the pattern


Raise it of 1/10 the total length.

Note that the raise part (center front side is narrower. The stand is smaller that at center back.


The fall (green line)


Draw the fall. Straight line at the top from center back to center front.
Shape it at center front to look like something you like.
The fall should "cover" the stand, it should be highter.


The stand in blue
The fall in green


Mirror the fall along the straight line.
The collar is taking shape


Modify the center back so it keeps right angles. (red lines)
We can extend down the center back line until a right angle is found. Then curve into the lower line (sewn on the neckline)


In red, we have the new collar outline.

We will have to develop so it sits well.


draw the cutting lines.
3 or 4, at equal distance and close to the shoulder seam : that where the collar turns the most.


Develop the collar.
Pivot at neckline making sure that no value is added there.

3 to 5 mm gap is enought for a small collar


Redraw nice curves and we are done


Watch the video for more details


Friday, 12 February 2021

How to draft the pattern of The trumpet skirt 2 : With peplum seam


That skirt is easy to draft. It is a bit more difficult than the previous one HERE


We start the same way as for the other trumpet skirt (see link above).

Skirt block with 2 darts evently distributed.

Lengthen


Join at side seam


Draw a line. It can be horizontal or slanted like on the drawing


Separate


On the bottom part, drawn vertical lines. 5 in my drawing, it could be more. They have to be equal width.


cut on those lines


Spread by pivoting along the top line. That line will curve but will remains the same length.


Redraw the outlines.


Another variante : with a curve instead of a line.


Have a look at the video


Thursday, 11 February 2021

How to draft the pattern of The trumpet skirt 1 (with panels)


The trumpet skirt, here done through panels is so easy to make


We start with a basic block for skirt.

Note that we have 2 darts on each parts and that they are evenly distributed.

We place the first dart closer to the center front and the other dart half way between the first dart nd the side seam.


As it is a close fitted skirt, no need to give enlargements on the side.


Lengthen as you want


draw vertical line below the darts.


Those will be the panels.


6 panels


Separate the panels

Note that the legs of the dart are in the seams.


flare out equally at the level you want : knee, calf....


Lower 


or higher


Different variations


The flares don't have to be on the same horizontal line


MORE IN THE VIDEO


Pattern Making : where to start ? Block or no block?

Pattern Making : where to start?  I start with a block That is the way I have been introduced to PatternMaking from the design school. It is...